
WordPress网站用户有个最直接的需求,就是修改用户头像。对于每一个WordPress网站运营者都需要直接面对这个问题。一般来说,有三种方法来处理这个问题:
处理这个问题的三种方法:
- 通过 Gravatar.com修改,这是WordPress标准的方式
- 使用WordPress插件
- 添加自定义代码到 functions.php中
在问题深入之前,我们先了解一下WordPress头像。
什么是WordPress 头像?

通常关联用户评论。
如果使用bbPress或BuddyPress,头像会关联到论坛上显示用户资料或活动文章信息等。
默认,WordPress给每个用户使用预定义头像。
预定义的头像不存于您的服务器上。
而是存于gravatar.com 网站上。
如何通过 Gravatar.com修改资料头像?
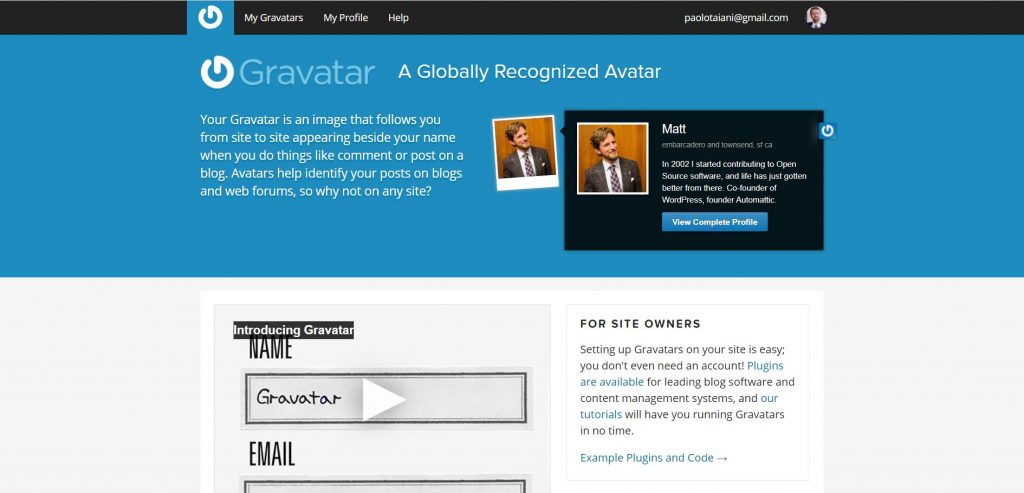
您可以通过WordPress.com账号链接,或创建一个账号,然后上传您的头像。
Gravatar代表全球认可的头像,是与Gravatar.com上的电子邮件地址关联的个人资料图片。
每当您在任何WordPress支持的网站上撰写评论,论坛帖子或博客帖子时,都会使用您的gravatar。
这对WordPress.com博客和自托管WordPress网站均有效。
全球头像听起来像一个很棒的功能,那么为什么有人要在服务器上简单地上传自己的头像?
可能有几个原因,但是最重要的三个原因可能是:
- 因为从gravatar.com加载可能会大大增加加载时间。
- 完全控制您网站上加载的资源。
- 最终因为不是每个人都有一个WordPress.com帐户或想要一个帐户。
- 有的国家无法加载gravatar.com上的头像。
如何通过插件修改WordPress头像?
有几个插件可让您的用户在WordPress网站上更改其个人资料图片。
但是,它们中的大多数将做得更多,并且您可能不需要它们的某些或大部分功能。
其中有很多可以让您为图片设置等级,如果您从远程加载头像(如gravatar.com)会很有用。
但是,如果要从本地服务器加载个人资料图片,这并不是必不可少的。
许多其他人也可以选择从前端上传头像。一个不错的功能,但是如果您只需要您的作者来更改其个人资料图片,那么可能就不需要了,因为作者应该已经可以访问WP后端。
我发现的唯一一个只允许在本地上传自定义头像并以简单方式完成的插件是Simple User Avatar插件。

主要区别在于我们的代码非常轻巧,少于100行代码(无注释)。
简单用户头像插件将添加大约两倍的代码行(在PHP,CSS和JS之间)。
除此之外,此插件不允许替换默认头像,也不会阻止从gravatar.com加载默认头像。
也就是说,它是迄今为止WordPress.org插件存储库中用于管理头像的最简单,最轻便的插件。
如果您在安装时添加另一个插件来让用户更改其个人资料图片没有问题,而您只需要这样做,我建议您使用Simple User Avatar插件。
如果不想使用插件,自己想要更多控制,下面的代码是您需要的。
如何使用自定义代码在WordPress上更改个人资料图片?
1)首先,我们需要加入媒体上传器脚本。仅将其加载到配置文件页面上很重要。我们使用操作admin_enqueue_scripts添加函数。
/**
* Custom Avatar Without a Plugin
*/
// 1. Enqueue the needed scripts.
add_action( "admin_enqueue_scripts", "ayecode_enqueue" );
function ayecode_enqueue( $hook ){
// Load scripts only on the profile page.
if( $hook === 'profile.php' || $hook === 'user-edit.php' ){
add_thickbox();
wp_enqueue_script( 'media-upload' );
wp_enqueue_media();
}
}2)接下来,我们需要创建功能以使用WordPress编辑个人资料页面中的媒体上传器脚本。我们使用动作admin_print_footer_scripts-profile.php和admin_print_footer_scripts-user-edit.php添加功能
// 2. Scripts for Media Uploader.
function ayecode_admin_media_scripts() {
?>
<script>
jQuery(document).ready(function ($) {
$(document).on('click', '.avatar-image-upload', function (e) {
e.preventDefault();
var $button = $(this);
var file_frame = wp.media.frames.file_frame = wp.media({
title: 'Select or Upload an Custom Avatar',
library: {
type: 'image' // mime type
},
button: {
text: 'Select Avatar'
},
multiple: false
});
file_frame.on('select', function() {
var attachment = file_frame.state().get('selection').first().toJSON();
$button.siblings('#ayecode-custom-avatar').val( attachment.sizes.thumbnail.url );
$button.siblings('.custom-avatar-preview').attr( 'src', attachment.sizes.thumbnail.url );
});
file_frame.open();
});
});
</script>
<?php
}
add_action( 'admin_print_footer_scripts-profile.php', 'ayecode_admin_media_scripts' );
add_action( 'admin_print_footer_scripts-user-edit.php', 'ayecode_admin_media_scripts' );3)现在,我们需要将头像的自定义图像部分添加到WordPress的编辑个人资料页面。我们使用动作show_user_profile和edit_user_profile添加函数。
// 3. Adding the Custom Image section for avatar.
function custom_user_profile_fields( $profileuser ) {
?>
<h3><?php _e('Custom Local Avatar', 'ayecode'); ?></h3>
<table class="form-table ayecode-avatar-upload-options">
<tr>
<th>
<label for="image"><?php _e('Custom Local Avatar', 'ayecode'); ?></label>
</th>
<td>
<?php
// Check whether we saved the custom avatar, else return the default avatar.
$custom_avatar = get_the_author_meta( 'ayecode-custom-avatar', $profileuser->ID );
if ( $custom_avatar == '' ){
$custom_avatar = get_avatar_url( $profileuser->ID );
}else{
$custom_avatar = esc_url_raw( $custom_avatar );
}
?>
<img style="width: 96px; height: 96px; display: block; margin-bottom: 15px;" class="custom-avatar-preview" src="<?php echo $custom_avatar; ?>">
<input type="text" name="ayecode-custom-avatar" id="ayecode-custom-avatar" value="<?php echo esc_attr( esc_url_raw( get_the_author_meta( 'ayecode-custom-avatar', $profileuser->ID ) ) ); ?>" class="regular-text" />
<input type='button' class="avatar-image-upload button-primary" value="<?php esc_attr_e("Upload Image","ayecode");?>" id="uploadimage"/><br />
<span class="description">
<?php _e('Please upload a custom avatar for your profile, to remove the avatar simple delete the URL and click update.', 'ayecode'); ?>
</span>
</td>
</tr>
</table>
<?php
}
add_action( 'show_user_profile', 'custom_user_profile_fields', 10, 1 );
add_action( 'edit_user_profile', 'custom_user_profile_fields', 10, 1 );4)我们还需要一个函数来将值保存在数据库中。我们使用动作personal_options_update和edit_user_profile_update添加函数。
// 4. Saving the values.
add_action( 'personal_options_update', 'ayecode_save_local_avatar_fields' );
add_action( 'edit_user_profile_update', 'ayecode_save_local_avatar_fields' );
function ayecode_save_local_avatar_fields( $user_id ) {
if ( current_user_can( 'edit_user', $user_id ) ) {
if( isset($_POST[ 'ayecode-custom-avatar' ]) ){
$avatar = esc_url_raw( $_POST[ 'ayecode-custom-avatar' ] );
update_user_meta( $user_id, 'ayecode-custom-avatar', $avatar );
}
}
}5)最后,我们将上传的图片设置为用户的头像,对于没有上传图片的用户,我们将使用创建的本地头像。我们使用过滤器get_avatar_url添加函数。
// 5. Set the uploaded image as default gravatar.
add_filter( 'get_avatar_url', 'ayecode_get_avatar_url', 10, 3 );
function ayecode_get_avatar_url( $url, $id_or_email, $args ) {
$id = '';
if ( is_numeric( $id_or_email ) ) {
$id = (int) $id_or_email;
} elseif ( is_object( $id_or_email ) ) {
if ( ! empty( $id_or_email->user_id ) ) {
$id = (int) $id_or_email->user_id;
}
} else {
$user = get_user_by( 'email', $id_or_email );
$id = !empty( $user ) ?  $user->data->ID : '';
}
//Preparing for the launch.
$custom_url = $id ?  get_user_meta( $id, 'ayecode-custom-avatar', true ) : '';
// If there is no custom avatar set, return the normal one.
if( $custom_url == '' || !empty($args['force_default'])) {
return esc_url_raw( 'https://www.dianjin123.com/wp-content/uploads/2020/07/29a2d3f1b215a3d272aa932cd4b912e9.png' );
}else{
return esc_url_raw($custom_url);
}
}


 苏公网安备: